Why Does the Same Glaze Come Out Different on Two Pots?
Quick Answer: Glaze results depend on application thickness, the clay body underneath, where the piece sat in the kiln, and how absorbent the bisque was when you dipped it. Thickness is the biggest factor by a wide margin - most glazes change character completely across a range you cannot see with your eye. Two pots from the same bucket differ because at least one of those four variables differed. The way to get consistency is to control thickness deliberately rather than by feel.
Studio potters spend years learning this by accident.
It is much faster to learn on purpose.


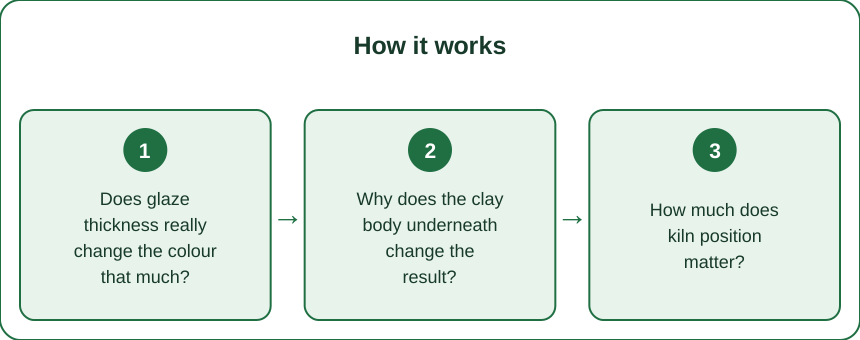
Does glaze thickness really change the colour that much?
Yes - it is the single largest source of variation, and the range that matters is smaller than you would guess.
Most glazes have a working thickness measured in fractions of a millimetre, roughly the thickness of a business card or a little more. Below that, the glaze goes thin and dry-looking, the clay colour shows through, and glossy glazes turn matte. Above it, colour saturates, the surface goes deeper, and some glazes begin to run.
Certain glaze families are dramatically thickness-sensitive. Rutile and iron-bearing glazes can shift hue entirely - a glaze that is honey brown at one thickness is blue-grey at another. Celadons look nearly clear when thin and deep green where they pool. This is not a defect; it is what the glaze does.
Your eye cannot judge this reliably on a wet pot. A wet glaze coat looks even when it is not, and it looks different depending on the light in the studio. The only dependable methods are timing your dip and checking with a needle tool.
Practical rule: pick a dip count and use it every time. A three-second count for one glaze and a one-second count for another, written on the bucket. Consistency of process produces consistency of result far more than skill does.
And check thickness on the dry glaze with a needle. Scratch a small line in an inconspicuous place. You will see the thickness immediately, and after a few pots you will start to be able to predict it by weight.
Why does the clay body underneath change the result?
Because glaze is partly transparent and partly reactive.
Colour shows through. Any glaze that is not fully opaque takes some of its final appearance from what is beneath it. The same celadon over a white porcelain and over a dark stoneware are two visibly different glazes - one bright and cool, one darker and muddier.
Iron in the clay migrates. Iron-bearing stoneware releases iron into the glaze layer during firing, which shifts colour and can produce speckling. This is where those small brown flecks in an otherwise clean glaze come from - the clay, not the glaze.
Absorbency changes how much glaze you pick up. A more porous bisque draws water out of the glaze faster and deposits a thicker layer for the same dip time. Two clay bodies bisque-fired identically can still absorb differently, so an identical three-second dip lays down different thicknesses.
And thermal behaviour differs. Clay bodies mature at different rates, and the fit between glaze and body determines whether you get a smooth surface or crazing. Crazing - that fine network of cracks - is a fit problem between glaze and clay, not a firing error.
The implication for a studio with multiple clay bodies: test each glaze on each body before committing. A small tile of every combination, fired together, saves an enormous amount of disappointment later.
How much does kiln position matter?
More than most beginners are told, and it explains the majority of the remaining variation.
Kilns are not uniform. Temperature varies between top, middle, and bottom, and between the outside edge and the centre of a shelf. Differences of several degrees are normal, and glazes near the edge of their maturing range respond visibly to that.
The classic pattern in an electric kiln: the top and bottom run cooler than the middle, though the specific profile varies by kiln and by how it is loaded. A glaze that goes glossy in the middle can come out dry on the bottom shelf.
Airflow and proximity matter too. A pot sitting close to another pot experiences a slightly different environment than one with clear space around it. In gas and wood firings this is enormous; in electric it is subtle but real.
Cooling rate is the underrated one. Some glazes - particularly matte and crystalline ones - develop their surface during cooling, not at peak temperature. A pot on a densely packed shelf cools more slowly than one in an open space, which changes the crystal development and therefore the surface.
What to do about it: fire a set of identical test tiles at several positions in the kiln, once. Map your kiln. Then place work knowingly - the pieces you care most about go in the spot you have learned is most reliable, and thickness-sensitive glazes go where the temperature is most consistent.

What about the bisque itself - does that change anything?
Yes, and this one catches experienced potters out because it varies invisibly.
Bisque temperature sets absorbency. A lower bisque leaves the clay more porous, so it drinks glaze fast and lays down a thick coat. A higher bisque is less absorbent and takes glaze more slowly. The same dip time gives you different results from two different bisque firings.
Dust is the silent problem. Bisque ware sitting on a shelf collects dust, and dust creates a barrier that produces crawling - those bare patches where the glaze pulled away from the surface. Wiping with a damp sponge before glazing solves it entirely, and almost nobody does it consistently.
Fingerprints do the same thing. Oils from your hands resist glaze. Handling bisque with clean dry hands, or wiping afterwards, prevents a whole category of surface flaws.
Moisture content matters at the moment of dipping. If you sponge a pot and glaze it immediately while still damp, it absorbs far less and the coat comes out thin. Let it dry fully first - which typically means an hour or more, not five minutes.
And the one that surprises people: humidity in the room changes drying and therefore absorption. In a humid late-summer studio, bisque holds ambient moisture and takes glaze differently than it does in a dry heated room in January. Same pot, same glaze, same technique, different season, different result.
What is the fastest way to get consistent results?
Control the variables in the order of how much they matter.
1. Standardise thickness. Time every dip out loud. Write the count on the bucket. Check with a needle tool on the first pot of each session and adjust.
2. Check the glaze density before every session. Glaze settles and water evaporates, so a bucket that gave you good results last month is a different consistency today. A hydrometer costs very little and removes this variable entirely - or at minimum, stir thoroughly and note how it coats a stirring stick.
3. Wipe bisque before glazing. Damp sponge, then dry fully. This single habit eliminates most crawling and pinholing.
4. Keep a fired test tile of every glaze, on every clay body you use. Hung on the wall by the buckets. The tile is the only honest reference - the wet bucket colour tells you nothing.
5. Write it down. Glaze name, dip count, clay body, kiln position, result. Six entries in a notebook will teach you more about your studio than six months of guessing.
And accept a certain amount of variation as the point. Glaze that behaves identically every time is industrial glaze. The pooling in the low spots and the break over the edges is why hand-glazed work looks the way it does - the goal is control over the variation, not its elimination.
FAQ: Glaze Consistency Questions, Answered
Why did my glaze crawl into bare patches?
Almost always a surface contamination or thickness issue. Dust, oils from fingers, or glaze applied too thickly over an underglaze. Wipe the bisque, keep the coat within range, and it largely disappears.
Should I dip or brush?
Dipping is far more consistent for a full coat because the timing is controllable. Brushing requires three coats to reach dipping thickness and gives more variation. Brush for detail and decoration, dip for coverage.
Why is my glaze thicker at the bottom of the pot?
Gravity, during the moment the glaze is still wet. Shorten the dip, and shake off excess promptly while holding the pot at an angle rather than upright. A rim-down drain for a second or two evens it considerably.
TL;DR:
- Thickness is the biggest variable - most glazes change character across a range thinner than a business card.
- The clay body shows through and reacts, so test every glaze on every body you use.
- Kiln position changes temperature and cooling rate; map your kiln once with test tiles.
- Bisque absorbency, dust, and fingerprints cause most surface flaws - wipe before glazing.
- Time your dips and write it down. Process consistency beats skill for repeatable results.
Before your next glaze session, count your dips out loud and write the number on the bucket lid.
Keep Reading
This article is for general informational and styling purposes only. Fit, sizing, and product availability may vary.